
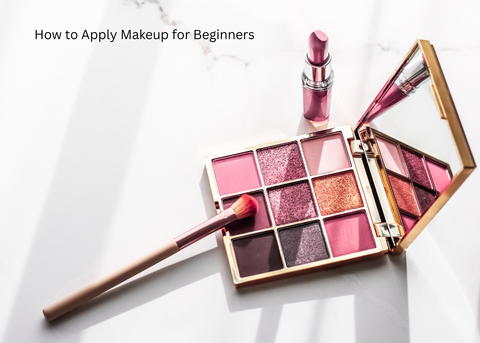
Step-by-Step Guide: How to Apply Makeup for Beginners
Starting a makeup routine can feel a bit overwhelming at first. You walk into a store or scroll through a website, and suddenly there are a hundred different products, shades, and tools staring back at you. But makeup doesn’t have to be complicated. With a few key products, some basic techniques, and a little practice, anyone can create a natural, polished look that fits into their daily life.
If you're new to it all, this makeup guide for beginners is exactly what you need. It's straightforward, beginner-friendly, and covers every essential step without overloading you with information. The idea is to help you build confidence and get comfortable with your makeup routine.
Know What You Need
The first thing to sort out is your toolkit. You don’t need a huge collection of products to get started. The basics are more than enough when you’re learning how to apply makeup for everyday wear. A simple routine usually includes:
- A lightweight moisturizer
- Primer
- Foundation or a skin tint
- Concealer
- Blush or multipurpose tint
- Mascara
- Lip tint or gloss
- A good blending tool
And honestly, with just a few of these, you can already pull off a complete and polished look. Many people starting out with makeup for daily use find it helpful to pick products that multitask. For example, our Get Even Hydra Jelly Tint is designed to work on your cheeks, lips, and eyes. It cuts down on the clutter and makes your life easier.
Step 1: Skin Prep Is Everything
Before any makeup touches your face, skincare is the first step. A clean, hydrated canvas makes all the difference in how your makeup sits and lasts. After cleansing, apply a moisturizer that suits your skin type. Give it a minute to absorb, then go in with a primer. This helps to smooth out your skin, reduce the appearance of pores, and keep your makeup in place longer.
If you’re using a foundation or base product, primer gives it something to grip onto. It also helps prevent your makeup from breaking apart throughout the day.
Step 2: Create a Natural Base
Foundation is where many people get nervous, but it doesn’t have to be complicated. You can start with a lightweight formula or skin tint that evens out your complexion without covering everything. It should feel breathable, not cakey.
Dab a bit on your face, forehead, cheeks, chin, and blend it out using a soft tool. A good option is the Crystal Blend Sponge, which blends seamlessly and is easy to control. The flat side works well for larger areas, while the pointed end helps you get into tighter spots like around your nose or under the eyes.
Step 3: Conceal, Don’t Cake
You don't need to hide everything. Just target the areas that need a bit of help, like dark circles, blemishes, or redness. Apply a small amount of concealer and tap it into the skin gently. If you're using a sponge, the pointed end of the Crystal Blend Sponge gives a precise finish without dragging the skin.
For under-eye areas, go one shade lighter than your foundation to brighten up. For blemishes or redness, stick to a tone that matches your base exactly.
Step 4: Add Life Back to Your Face
Once your base is even, you’ll want to bring some natural color back in. This is where blush comes in. Instead of separate products for cheeks and lips, a multipurpose tint saves time and effort.
For a natural flush, glide on a product like the Soak It Hydra Jelly Tint. It has a dewy finish that blends easily into the skin and leaves a fresh, glowing look. Apply it to the apples of your cheeks and blend it upward. You can use your fingertips or a sponge, whichever feels easier.
You can also tap a small amount on your lips for a subtle, coordinated tint. The fact that it hydrates while adding color makes it a great everyday choice.
Step 5: Enhance the Eyes (Simply)
For beginners, eye makeup should be as effortless as possible. You don’t need to dive into complex eyeshadow looks. Curl your lashes and apply a coat of mascara. It opens up your eyes and adds definition without too much fuss.
If you want to take it one step further, apply a hint of your jelly tint on your eyelids. The Get Even Hydra Jelly Tint works beautifully here. A quick tap with your fingertip can give you that soft, monochrome effect that ties your whole look together.
Step 6: Lips to Finish
You’ve already got your lips subtly tinted if you used a multipurpose stick. But if you want to enhance them a little more, add a second layer of the same product. It gives more depth without needing an entirely different product.
The beauty of the Get Even and Soak It tints is that they’re buildable. You can go from sheer to bold just by layering, and they stay put without feeling sticky or drying out your lips.
Optional: Set Everything in Place
You don’t have to use a setting powder or spray, especially if your makeup routine is light. But if you have oily skin or a long day ahead, setting your makeup can help it last.
Use a light hand. Focus on your T-zone (forehead, nose, and chin), where oil tends to show up first. A fluffy brush or a blotting sponge will do the trick. You’re just locking things in without weighing the skin down.
Finding Your Shades
Choosing the right shades can take a bit of trial and error, but there are a few helpful tips:
- Test foundation along your jawline.
- For tints, think about your natural lip and cheek color. That’s usually your best match.
- Fair skin tones usually go well with peach and light pinks.
- Medium tones work with corals and soft berries.
- Deeper skin tones shine with bold berries, deep roses, and warm reds.
The Soak It Hydra Jelly Tint and Get Even Hydra Jelly Tint both come in shades that suit a wide range of tones, and since they’re buildable, you can control the intensity with ease.
Tips That Actually Help
Instead of chasing every trend, keep things personal and simple. These tips often work best for beginners:
- Less is always more, especially when starting out.
- Stick to multipurpose products. They simplify your steps.
- Don’t rush blending. It makes everything look better.
- Work in natural lighting if you can. It’s the most honest mirror.
- Give each product time to set before applying the next.
Final Word
Getting comfortable with makeup for beginners doesn’t mean you need to master everything at once. Start with simple techniques and products that suit your skin and your style. The key is to build a routine that feels good to use and lets you feel like yourself, only a little more polished.
Keep your process light, your steps easy, and your products versatile.
If you’re ready to create a soft, radiant look with minimal effort:
- Blend your base easily with the Crystal Blend Sponge.
- Add a fresh glow using the Soak It Hydra Jelly Tint.
- Finish it off with lips and cheeks using the Get Even Hydra Jelly Tint.
Small steps go a long way, and your makeup journey can start today, right here.
Key Takeaways
- Start with clean, prepped skin to create a smooth base for your makeup.
- Use a blending sponge for even foundation application and natural coverage.
- Multipurpose tints simplify your routine while adding colour to lips, cheeks, and eyes.
- Stick to light layers and build up only where needed for a clean, everyday look.
- Choose shades that match your natural skin and lip tones for a seamless finish.
FAQs
1. What makeup do I need as a beginner?
Start with a moisturizer, primer, foundation or skin tint, concealer, a multipurpose tint, mascara, and a blending sponge.
2. How do I apply makeup in the correct order?
Begin with skincare, then move to primer, base (foundation and concealer), followed by color (blush and lips), eyes, and finish with optional setting.
3. What’s the best way to blend the foundation for beginners?
Use a damp sponge like the Crystal Blend Sponge for seamless, streak-free blending.
4. Can I use the same tint for cheeks and lips?
Yes, multipurpose products like Soak It Hydra Jelly Tint and Get Even Hydra Jelly Tint are designed to work across both areas effortlessly.
5. How do I find the right shade for my skin tone?
Match foundation on your jawline and pick tints that resemble your natural lip or cheek colour. Go lighter for fair skin, deeper for richer tones.
Comments (0)
There are no comments for this article. Be the first one to leave a message!