
Eyebrow Shapes for Your Face: How to Find the Best Shape
Table of contents
- Why brows change the whole face (in minutes)
- Step 1: Map your brows (makeup-only, reversible)
- Step 2: Read your face shape
- Step 3: Pick a shape that balances your features
- Decision box: thickness, tail length, and arch height
- Quick routine: try the look before you tweeze
- Key takeaways
- FAQs
Why brows change your whole face (in minutes)
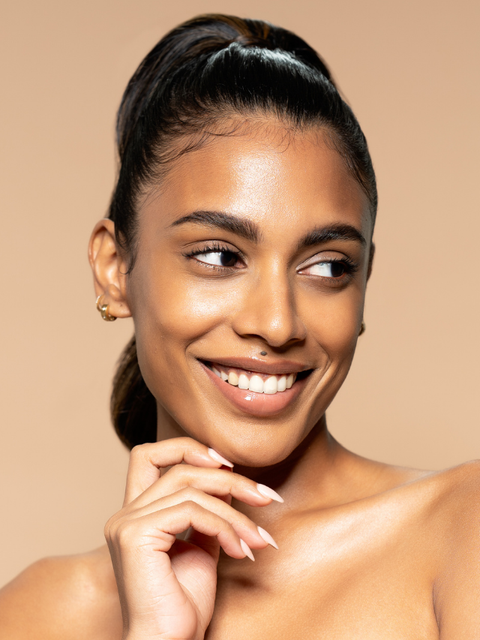
Brows frame the upper third of your face. Even a small shift in your brow’s angle or thickness can change how lifted, soft, or structured you look. Before we talk about shapes, the safest path is to test ideas with your makeup. That way, you can preview the symmetry and balance of your brows, then decide if any hair removal is worth it.
This links to the core method you’ll use below, which is brow mapping. It’s a simple way to mark the start, arch, and end points to ensure that both sides of your brows match. This method is usually used by professionals, but fixing your brow shape shouldn’t have to cause multiple salon visits or additional inconvenience. So, the silver lining is that you can do a light version of it at home using a pencil and a concealer! Brow mapping focuses on proportions rather than trends, which is why it adapts to any face.
Step 1: Map your brows (makeup-only, reversible)
Goal: Mark where your brows should begin, peak, and end on your face.
- Start: Hold a pencil vertically from the middle of your nostril to the inner corner of your eye. Where the pencil touches your brow marks the start.
- Arch: Angle the pencil from the nostril through the outer edge of your iris. The crossing point is your highest peak.
- End: Angle from the nostril to the outer eye corner. This is the tail end.
Connect the points softly with a brow pencil. Don’t pluck yet!
Makeup setup (reversible):
- Outline your trial shape, then sharpen the edges underneath with our Get Even Concealer to “lift” the brow line without touching the hair.

- If you want gentle fullness, sketch micro-strokes and diffuse with our Get Even Dual Smudge Stick for soft density.

- Brighten the brow bone and inner corner with Eye Light Eyeshadow Sticks to balance heaviness around the arch.

Patch-test color cosmetics near the brow area if you have sensitive skin. Keep the pressure light and remove with a gentle cleanser.
Step 2: Read your face shape
You can treat face shape as a helpful guide, not a strict rulebook. The aim is balance. If your features read round, a touch of angle adds some structure. If your lines feel sharp, a softer curve takes the edge off. That’s why most pros start with a few simple eyebrow shapes, which could be round, straight, soft-angled, hard-angled, or S-shaped, and then fine-tune two knobs that change everything: thickness and tail length.
To figure out what you’re working with, do a 30-second mirror check.
Tie your hair back, look straight ahead, and, if you have one, trace your face outline on the mirror with a dry-erase marker.
Step back and notice three things in order:
- how long vs. wide your face looks,
- how defined your jawline is, and
- how roomy your forehead feels.
Those clues point you toward a starting shape you can test in makeup before making anything permanent.
Step 3: Pick a shape that balances your features
Below, you’ll see a mapping-first, makeup-only way to try each option. Use it as a reversible preview before you trim your brow hair.
If your face is oval
Balanced base; most shapes work. A soft-angled brow maintains harmony without narrowing the forehead. Try a medium arch height and a tail that ends where mapping suggests.
If your face is round
Add definition with a higher, soft-angled arch to introduce gentle structure. Keep the front soft and avoid making the tail too low because it may pull your eye down.
If your face is square
You already have strong lines. A soft-angled or curved brow can smooth edges, while a hard, sharp peak may overstate angles on some faces.
If your face is heart
Balance a wider forehead and narrower chin with a rounded or soft-angled brow. Keep the tail subtle so the outer eye area doesn’t feel heavy.
If your face is long
A straighter brow can visually shorten the length. Keep the arch low-to-medium and extend the tail only to your mapped end point.
If your face is diamond
Cheekbones are prominent. Aim for a soft curve with a moderate peak to even out width through the center.
Tip: Each of these can be worn in thin, medium, or thick versions. Start with medium, since extremes are harder to maintain and less forgiving if you change your mind.
Decision box: thickness, tail length, and arch height
- Thickness: follows your natural growth. If your hair is dense, a medium-to-thick outline looks most natural. If it’s fine, build soft density with micro-strokes rather than drawing a solid block. Our Get Even Dual Smudge Stick blends lines without harsh edges.
- Tail length: Stop at your mapped end. A tail that drifts further can droop the outer eye.
- Arch height: Raise it to add lift on round faces. Keep it moderate on angular faces to avoid severity.

Quick routine: try the look before you tweeze
Time: 8–10 minutes
Why: it’s fully reversible and lets you live in the shape for a week.
- Outline lightly. Mark start/arch/end of your brows using mapping.
-
Clean the underside. Trace a razor-thin line of Get Even Concealer under the brow and blend downwards to fake a tidy edge.

-
Add soft density. Flick hair-like strokes; blur with Get Even Dual Smudge Stick so they read as brows and not blocks.

- Lift with light. Tap EyeLight Eyeshadow Sticks on the brow bone and inner corner.
- Live in it. Wear the shape for three to five days. If it still feels right, remove only the obvious strays outside your mapped lines.

Before we go further, here’s the part most people miss: The perfect eyebrow shape is the one you can maintain with your real growth pattern. If daily drawing fights your hair direction, adjust the template rather than forcing it.
Key takeaways
- Map your start, arch, end first; it’s the fastest path to symmetry.
- Pick a shape to balance your face: angles add structure; curves soften; straight shortens length.
- Preview with makeup: Get Even Concealer for a crisp underside, Get Even Dual Smudge Stick for soft fullness, EyeLight Eyeshadow Sticks for gentle lift.
- Tweak thickness and tail length conservatively; live in the look before you remove hair.
- Keep it skin-friendly and reversible; trends are optional, comfort is key.
FAQs
What are the main categories or “types of eyebrows”?
Most tutorials group them as rounded, straight, soft angled, hard angled, curved, and S-shaped. You’ll also see lists of eyebrow shapes with name variations, which are simply small tweaks in peak height and tail.
How do I find the best eyebrow shape for me?
Map first, then choose a template that balances your face shape (sections above). Try it with makeup for a few days before removing your brow hair.
Are thick eyebrow shapes always more flattering?
Fullness can look fresh, but thickness should match your growth. If your brow hair is sparse, build soft density with strokes and diffusion, not a solid fill.
What about trend shapes like straight or S-brows?
Trends are fine to test in makeup. Keep the tail at the mapped end point and start with a low-to-medium arch so you can dial up or down later.
I’m new. Can I do this at home?
Yes. Mapping is a stencil-free method that anyone can try with a pencil and concealer. If symmetry stresses you, a quick clean-up once sets the template for easier home upkeep.
What are the common eyebrow types female guides mention?
The same core shapes apply regardless of gender; most consumer guides simply target women because they buy more brow products. Use the face-shape logic.
Is there a list of different types of eyebrows and maintenance steps?
Use the five moves above: map → outline → clean with concealer → add soft density → live in it. That routine works across categories.
Comments (0)
There are no comments for this article. Be the first one to leave a message!