
How to Use Lip Tint for 12-Hour Color: Pro Makeup Artist Tutorials
Lipstick fades. Lip gloss transfers. But lip tint? It stays loyal all day long.
We’ve all been there, spending precious minutes in the morning perfecting our lip look, only to find it vanished by lunchtime. Whether you’re sipping on coffee, snacking mid-commute, or surviving back-to-back meetings, your lip color needs staying power. That’s where lip tints come in, a low-maintenance, high-impact alternative to traditional lipsticks.
But here’s the catch: most people don’t use them correctly. If you’re wondering how to use lip tint so it actually lasts 12 hours without flaking, fading, or drying you out, this guide has you covered, start to stain finish.
What is a Lip Tint (and Why It's So Different from Lipstick)
A lip tint is a lightweight, pigment-rich formula that stains the lips rather than sitting on top like traditional lipstick. Think of it as a semi-permanent watercolor for your pout. It blends with your natural lip tone to create a just-bitten effect that looks fresh, flushed, and totally effortless.
Unlike lipsticks, which are wax- or oil-based and fade with food or friction, lip tints penetrate the top layer of skin. That’s why they last longer and don’t smudge easily.
Imagine this: You’re heading to an outdoor brunch. You swipe on your favorite rose-tinted stain at 9 AM. Flash forward to 5 PM, and it’s still there, giving you that perfectly faded “I actually look like this” aura.
A Step-by-Step Guide on How to Apply Lip Tint for 12-Hour Wear
Getting long-lasting color isn’t about layering on product until your lips suffocate. It is about strategy. A great tint lasts because of how you prep, layer, and set it. These eight pro-approved steps will help you nail a look that survives coffee, chaos, and cute conversations.
Step 1: Start with a Smooth Canvas
Before anything touches your lips, do this: exfoliate.
Use a soft toothbrush or a gentle sugar scrub to buff away dead skin. Lip tints are clingy by nature, and any flaky patches will absorb more pigment, leaving behind a patchy, uneven mess.
Your lips are like a wall. You wouldn’t paint over cracked plaster, right? Same logic. Smooth the surface first to get that seamless tint payoff. Although make sure to not overdo this. Once a week is enough.
Step 2: Apply a Hydrating Balm and Blot
This step is often skipped and it shows.
Lip tints work best on hydrated lips, but too much moisture will block the pigment from staining. The key? Apply a lightweight colourless lip balm. Let it sink in for a minute, then blot it off with a tissue. This leaves behind just enough hydration to keep your lips soft without interfering with the tint’s staying power. Think of it as priming your lips.
Step 3: Apply a Thin First Layer of Tint
Now for the star of the show: your tint.
Start by dabbing a small amount of tint in the center of your lips. Then, using either the applicator or a clean fingertip, gently tap the product outward toward the edges. Avoid rubbing or swiping. It will cause streaking and can over-deposit pigment in one area.
Less is more. You can always build up, but removing too much stain is... let’s just say, a scrubbing nightmare.
Step 4: Let It Dry Completely
This step is not optional. If you skip it, your tint will betray you by smudging or transferring.
After applying your first layer, wait a full 30–60 seconds without touching your lips together. Let the formula set and sink into the skin. This is the moment where the magic happens, where the color transforms from liquid to stain.
Hot tip: Do your mascara while waiting. Multitasking is the ultimate pro behavior.
Step 5: Layer for Intensity
One coat gives you that natural, flushed “I just ate a popsicle” look. But if you want more pigment or a gradient ombré effect, now’s the time to layer.
Dab a second layer only in the center of the lips. This creates a fuller, plumper appearance without making the edges too dark. It also helps the color fade evenly over the day rather than disappearing in weird patches.
Step 6: Use Concealer to Sharpen Edges
Ever seen a pro makeup artist’s lip looks on Instagram? Clean. Crisp. Defined. That’s not by accident.
Take a small flat brush and a touch of creamy concealer, then gently trace around the outer lip line. This refines the shape and hides any accidental smudges or color bleeding. It’s the difference between “I threw this on in a cab” and “I woke up flawless.”
You don’t need a lip liner, concealer creates even more drama-free definition.
Step 7: Lock It In with Translucent Powder
This is the backstage trick nobody talks about.
Once your tint is set and clean, take a fluffy eyeshadow brush and pick up a small amount of translucent setting powder. Lightly dust it around the lips, not directly on them. This creates a matte barrier that prevents feathering and keeps your tint in place, even if you're smiling, sipping, or speed-talking all day.
Bonus: It absorbs oil from your skin so the edges don’t get shiny or melt.
Word of Caution: Avoid Oily Foods
Sorry, dear foodies, this one hurts.
Oil is the sworn enemy of lip tint. It breaks down the pigment particles that tint your skin, making them fade faster or disappear completely. So if you want your color to stay put, opt for non-greasy meals, or eat carefully (yes, that’s code for fork-and-knife your fries).
Pro move: Use a straw for drinks, and reapply balm, not tint, post-lunch to refresh the finish without disturbing the base.
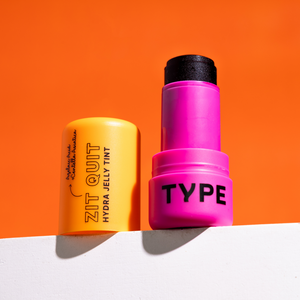
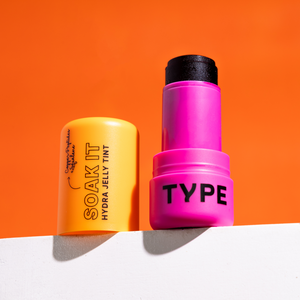
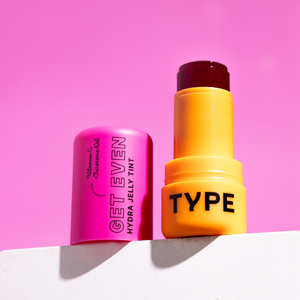
Want a water-based tint that stains without drying your lips out? Try Hydra Jelly Tint by Type Beauty, a breathable formula with hyaluronic acid for long wear and hydration.
One Product, Two Uses
The real MVP move? Use your lip tint on your cheeks for a cohesive, fresh-faced look.
Here's how:
- Dot a small amount of tint on the apples of your cheeks.
- Blend quickly with your fingers or a damp sponge because tints dry fast.
- Build up gradually if you want more color.
This gives you that post-yoga flush even if you haven’t stepped outside all day.
Lip Tint Hacks for Beginners
If you’re new to lip tints, try these simple hacks to make the learning curve a breeze:
|
Hack |
Why It Works |
|
Use a balm before and after tint |
Creates hydration sandwich to reduce flaking |
|
Blot between layers |
Removes excess moisture and sets the stain |
|
Try ombré with two shades |
Add dimension by layering darker tint in center |
|
Clean Q-tip to fix mistakes |
Acts like a magic eraser before the tint dries |
Pro Tutorials for Looks That Actually Last
Try these three pro-inspired techniques for different occasions:
- Office Glow: Use a nude or rose lip tint with a matching cheek stain. Apply just one coat and pair with brow gel for a polished minimal look.
- Night Out Bold: Layer a cherry red tint three times with drying in between. Tap a clear gloss only in the center for extra shine.
- Beach Day Natural: Use a peach tint on lips and cheeks, topped with SPF balm. Pair with waterproof mascara and call it effortless.
Ready to give your lips and cheeks a long-lasting glow? Try our Hydra Jelly Tint now.
Key Takeaways
- Lip tint is a pigment stain, not a cream or gloss so application technique matters.
- Exfoliation, balm, and thin layers are the holy trinity of tint longevity.
- You can use lip tint on cheeks for a monochrome glow.
- Avoid oils and smacking your lips post-application to extend wear.
- Finger-tapping and blotting beat swiping any day.
- Play with layering and ombré styles to customize your finish
Frequently Asked Questions
1. How do you apply lip tint for long-lasting color?
To make your lip tint last all day, start by exfoliating your lips to remove dead skin. Follow with a hydrating balm, then blot it off so your lips aren’t too slick. Apply the tint in thin layers using tapping motions, never rub or swipe. Let each layer dry completely before adding another. For bonus staying power, avoid oily foods and set the edges with translucent powder.
2. Can you use lip tint as blush?
Absolutely! Lip tints double beautifully as cheek stains, especially when you want that monochrome makeup look. Just dot a small amount on your cheeks and blend immediately with your fingers or a damp sponge, tints dry quickly, so don’t wait. It gives a natural, dewy flush that looks like a post-walk glow. Stick to lighter shades for daytime and build if needed.
3. Is lip tint better than lipstick?
That depends on what you’re after. Lip tint gives a lightweight, natural-looking color that doesn’t smudge or transfer easily, making it great for long days. Lipstick offers bolder pigment and more variety in finishes, but usually requires reapplication. If you’re into low-maintenance beauty with a just-bitten effect, lip tint is the winner. For glam evenings, lipstick might take the crown.
4. Should you use fingers or a brush for lip tint?
Your fingers are often your best tool with lip tints. The warmth helps the product melt into your lips, creating a seamless stain. Use gentle tapping motions for even blending. A brush, on the other hand, is great for precision, especially if you’re doing ombré lips or want sharp edges. Just avoid smearing the product around. Control is key, no matter the tool.
5. How do you fix mistakes while applying lip tint?
If the tint goes outside your lip line or looks uneven, act fast. Use a cotton swab dipped in micellar water to clean up the edges before it sets. For dried-down mistakes, reach for a creamy concealer and a small brush to tidy things up. This not only corrects errors but also sharpens the lip shape. The trick is catching it early, lip stains are clingy by nature.
6. Can lip tints dry out your lips?
Some can, especially alcohol-based or matte formulas. But newer-generation tints, like water-based or jelly variants, often include hydrating ingredients like aloe vera or hyaluronic acid. To keep lips comfy, prep with a balm before application and top up with a clear balm or gloss if needed. Think of it as a balance, hydration sandwich with a pop of color in the middle.

Comments (0)
There are no comments for this article. Be the first one to leave a message!